Friday, January 15, 2010

Flat Screen TV Bracket


Ok so it was supposed to be a simple project (aren't they all). I decided to install our flat screenTV in our bedroom. How hard could that be right since it is a small 21 inch flatscreen TV.

The first mistake was thinking it was simple. After going to Sam's Club I picked up up a "Universal" wall mount bracket. I brought the bad boy home and the issues started. After reading through the instructions in 15 languages except for english, hieroglyphic examples and baggies of who knows what I decided to wing it.

After finding the appropriate stud I placed bracket on the wall and marked holes were I wanted screws to go. I began to drill pilot holes through sheet rock and wood stud. After starting the second home I broke my Titanium (so the box says) bit in the hole. (Note to self...need new drill as bits are spinning in chuckless drill at times. At least that the excuse to get that nifty new Dewalt at Lowes). After changing bits I continued with pilot holes and began to install first screw. I hear creaking...popping, this can't be good. The screw gets loose and wham I nearly fall over. I busted a 3 inch lag screw in the wall and it was probably a half inch thick screw. I chop up the issue to inferior quality of cheap chinese made bolts that came with bracket.


After venturing over to Osh and picking up 4 screws (two more than needed because I could not remember what size screws I needed) problem resolved. I moved bracket to a different spot, marked holes and begin to pilot drill again. This time the pilot holes are drilled without a hitch and I screw bracket to wall....almost. Since I only have a few wrenches I'm unable to screw bracket completely to the wall as I need a socket and ratchet to complete project. So I let TV hang loosely from wall over night, although it is safe since 2 3/4" of screw is into the wall.

Next day I arrive to the plethora of socket sets in Lowe's. I decide since I own no sockets I purchase the set one step below the full mechanic set as I doubt I have any use for a 1/2" drive. Although while driving home I ponder if I should have purchased the other socket set with the additional 1/2" drive.

After arriving home I finishing tighten bracket, although not too much for fear of breaking another bolt. I stand back proudly admiring my work, as Mrs. Q enters.

Mrs. Q: "What about that big ugly hole."
Mr. Q (cringe) "Oh, that is were I broke the bolt in the wall."
Mrs. Q: What!
Mr. Q: "Umm, nothing. Drywall patch will cover it up."
Mrs Q: "Are you sure it is level."
Mr. Q: "It's fine."
Mrs Q: "It doesn't look level. Did you use a level."
Mr. Q: "No, why it can't be that hard to level it's a little bracket." (plus it is down stairs and no way in hell was I going to the garage after all this mess to re-install the stupid bracket)
Mrs. Q: "I don't know."
Mr. Q: "It's fine."

Hmmm maybe it's not level. Well I have a cheap level downstairs but bigger is better. On a different day I go back to Lowes and purchase a new level.

Let's look at the bracket one more time.

@*#%, I guess she was right. Well if you turn your head slightly while laying down it looks perfectly fine.

Thursday, January 14, 2010

The Kitchen - Part 3

Priming and Painting


After the pulling apart, re-installing and light sanding of the cabinets its time to prime and paint. We started with Kilz latex primer-2 coats.
Then 2 coats paint. We are using Valspar Antique Burgundy. Be sure to go nice and slow, using a good quality brush and make long strokes to not end up with any chunky spots.
Woo! That paint is bright purple in the can and when it first goes on. If I were not an experienced painter I would have freaked out!
However, I know well that it always dries darker and especially darkens nicely with multiple coats. See! Looks great so far right?! It helps that I also organized the cabinets.
Once we got the framing all painted we gave it 2 coats of Minwax Polycrylic sealant. We cut down and installed the faux marble laminate countertops from Ikea (which was much more difficult than expected due to the thickness of those bad boys) and installed the new stainless steel vent hood...with halogen lighting! Mr. Q says that with all 4 bulbs in it looks like a UFO landing. LOL. I say they somehow make that crappy old white stove look good! It looks new which is good because it gives us a lot more time before we must replace it and given the lack of budget, that is a good thing.

So what do you think? Looking good so far right? Major improvement already. We will get the doors and drawers back on as soon as we actually get to painting them (the one in the picture is the only one we did). I'm going to get down to the garage tonight and get that started! Well, thats the plan anyway.


Stats

Days into project: 18
Project running total: $455
Part 3 cost: paint, primer (5 gal bucket for future projects too), poly, supplies - about $100
20' of faux marble Ikea countertops - $140
stainless steel vent hood - $200

Tell us what you think!

Monday, January 11, 2010

The Kitchen- Part 2

Prep Work and Structure

First we decided to start on the side of the kitchen that would be easiest because A) it was smaller and B) it had the least visible issues. That pile on the counter is the plastic 1/4 round trim that I pulled of by hand. As you can see there was a lot of it. And as we pulled it off, we would see exactly why. There were major gaps in many areas. =/

Next, we removed all the cabinet doors and drawer fronts being careful to label each one. Not only do some of them have to go back to a certain spot, we read that they just do better when put back on the exact same place so we devised a system.

I labeled masking tape, a baggie and then the door or drawer back as well as the cabinet or drawer it came off of. Phew! To keep myself in order I wrote each number on the tape twice then on the baggie. As soon as I got the door and hardware off I put the hardware into the baggie then gave the inside of the cabinet (hinge side) and the door a number. I used the place for the hardware to stick the tape because it wont need painting so you won't be fighting with moving it around and essentially, getting it lost. Now I know should that happen or say I skipped this step altogether, with a little effort, we could get the kitchen back together. But why bother with frustration in the homestretch of the project. And further, why risk additional drilling and banging up of your freshly refinished doors!
Moving on. The game plan: Lower the cabinets a few inches and install trim work on top giving it a custom cabinet look. We are not the tallest people on the earth so cabinets are always a little out of reach. (Mostly for the Mrs.) But, these seemed a little more so than usual. After some measuring and some Googling we discovered that the space between the lower and upper cabinets should be about 18 inches. We were pushing 24 inches! No wonder I could barely reach anything!

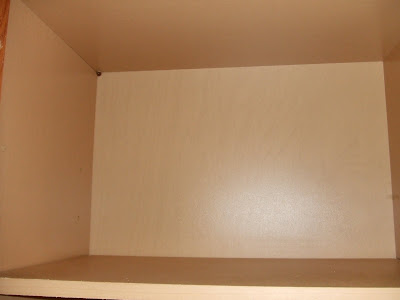
This next picture seems pointless but look carefully at the small black dot in the upper left corner. Yes that is a screw. The only screw. We realized that there was not more than one or two screws per cabinet! Yikes! Especially since I had loaded up our stock pile of canned goods from Sam's Club into these cabinets.
We pulled them all down and started with the stud finder. Ugh. Challenge number one. On an 8 foot wall we had 4 studs in very odd places. The first was the end of the wall on the far right. The next was about 18 inches in from that, then another 23 inches placing it just on the outside of the stove. The last one was only really a half of a stud on the inside wall. Suddenly we understood the one screw into basically the ceiling mount job they had done. We Googled yet again what the heck we were supposed to do about this. A mounting strip.
"Hi Ho, Hi Ho, back to Lowe's we go..."


We picked up some 1 x 2's to used as the mounting strip and some 4 inch screws to attach the cabinets. They had to be long because now they had to go through the cabinet, through the mounting strip, through the drywall and still have enough to grip the stud. We also got a 2 x 4 to use as a plumb line.

First we measured up from the cabinets and down from the ceiling (ended up dropping them about 3 inches) and did our best to level the crap out of that plumb line. Drill it in. It will also serve as a helping hand to hold those cabinets in place while you attach them. Next went in the mounting strips into the studs on the tops and bottoms of where the cabinets are supposed to have screws attaching them. You can see me above giving the faces a quick sanding before putting them back up. After you attach your first cabinet (making sure to keep level) then level out the second, attach to the wall then also to the cabinet next to it and so on. **Use the pre-drilled hinge holes to attach the cabinets to each other. ***Go in through the opposite side that you plan to mount the hinges on. We also discovered this is why many of our doors opened the wrong way.

The Stats

Days into project: 3
Project running total: about $32
Part 2 cost breakdown: boards $4, screws $6, clamps $22

Thursday, January 7, 2010

Salsa Frenzy


Ok so we started a Salsa Frenzy. We went to town with purchasing Yellow Chili, Jalapenos, Anaheim Chili, Onions, Garlic all you can think of. Our first attempt was at fresh salsa. Basically we took our ingredients diced them and mixed. However we were not fully satisfied. I should say my palette less than the Mrs.

I was looking for more. More flavor, more heat, more real Mexican. We started out roasting our Yellow Peppers, Jalapenos and Roma Tomatoes in a dry pan over medium high heat. Once they were done roasting (skin blistering) we placed in a bowl that was lined with a moist paper towel. We then covered them with a moist one as well and let cool.

After about 15 minutes we began to peel (using gloves) the blistered skin from all the ingredients. Also the tops were chopped off the chilis and jalapenos. Once this was complete they were tossed in the food processor (blender was in the dishwasher) and mixed. We added Sea Salt, Garlic, Lime and Onion to the mix, and viola! After a little trial and error this is what we came up with:

5 Roma Tomatoes

2 Yellow Chilis

3 Jalapenos

1 Lime

3 Garlic Cloves

1/4 White Onion

*Cilatro would be good however we didn't have any.

Sea Salt to preference

Swanky Stuff Wish List - Martini Set


From time to time we shall post lovely things that we find for our infinite wish list. They are purely for the drool factor (anyone who loves design know what we're talking about). However, should any of our equally lovely family or friends feel inspired to bestow upon us a gift for birthdays, anniversaries, Christmas, mother's day, father's day, President's day or Groundhog day, this could serve as a great place to start =)

So, without further ado...

This monogramed martini set from Swaggergifts.com is pretty sweet. I love the big decanter so you could easily get your shake on then fill that puppy up and thus, refill those glasses several times over before you have to go back. And that glass stir stick! Feels so 1930's. And while I do like how the wider rim martini glasses look these are still beautiful and look more functional for two reasons: 1) they seem deeper which means they probably hold more. I'm not much of a sipper so I need a glass that can hold me longer than 3 minutes. 2) the narrower rim also mean less spills from me and my guests. Hooray! Because spilling on our luscious dark walnut hardwood floors is a no, no.
At $80 its kind of a splurge but one could argue, that includes the monogram! Woo hoo!


Wednesday, January 6, 2010

The Kitchen-Part 1


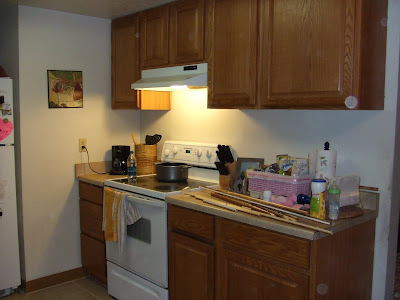
Day three of seven on our Christmas vacation. Another project started (adding to the numerous unfinished ones) but one worthy of starting this blog. The dreaded kitchen remodel. Living with the Honey Oak kitchen from hell, we could no longer could take it and decided to use our time off to do something about it.

BEFORE (yuck):
Since we couldn't afford a kitchen remodel by a licensed contractor (aka not your local mexican. I can say this cause we are.....and everyone we know is mexican). We figured we could do it economically (six packs and burritos) but also make a grand kitchen.

Our wish list consists of dark glazed full faced solid wood cabinets, Caesarstone quartz countertops, stainless steel appliances, and tiled backsplash. We checked out our options from Home Depot and our trusty friend Ikea.

WANTS (ooh la la):


After the realization the countertops alone were going to cost $3000 (mmm but aren't they yummy!) ... Houston we have a problem!

Since we are on a limited budget, we decided to make some cuts and dive into this project DIY style.

**A little background on Mr. and Mrs. Q. Mrs Q is handy with a brush, willing to take on any project and is over ambitious in starting them. Mr Q is handy once he gets going, and if giving the opportunity to purchase a new tool, will start any project Mrs. Q decides on. Although finishing it is whole another story, for another post.