Prep Work and Structure
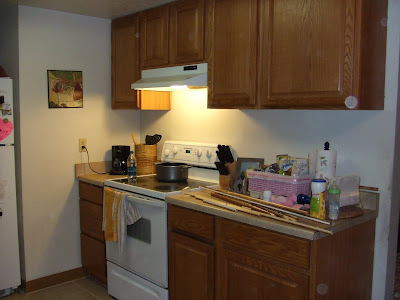
First we decided to start on the side of the kitchen that would be easiest because A) it was smaller and B) it had the least visible issues. That pile on the counter is the plastic 1/4 round trim that I pulled of by hand. As you can see there was a lot of it. And as we pulled it off, we would see exactly why. There were major gaps in many areas. =/
Next, we removed all the cabinet doors and drawer fronts being careful to label each one. Not only do some of them have to go back to a certain spot, we read that they just do better when put back on the exact same place so we devised a system.
I labeled masking tape, a baggie and then the door or drawer back as well as the cabinet or drawer it came off of. Phew! To keep myself in order I wrote each number on the tape twice then on the baggie. As soon as I got the door and hardware off I put the hardware into the baggie then gave the inside of the cabinet (hinge side) and the door a number. I used the place for the hardware to stick the tape because it wont need painting so you won't be fighting with moving it around and essentially, getting it lost. Now I know should that happen or say I skipped this step altogether, with a little effort, we could get the kitchen back together. But why bother with frustration in the homestretch of the project. And further, why risk additional drilling and banging up of your freshly refinished doors!

Moving on. The game plan: Lower the cabinets a few inches and install trim work on top giving it a custom cabinet look. We are not the tallest people on the earth so cabinets are always a little out of reach. (Mostly for the Mrs.) But, these seemed a little more so than usual. After some measuring and some Googling we discovered that the space between the lower and upper cabinets should be about 18 inches. We were pushing 24 inches! No wonder I could barely reach anything!
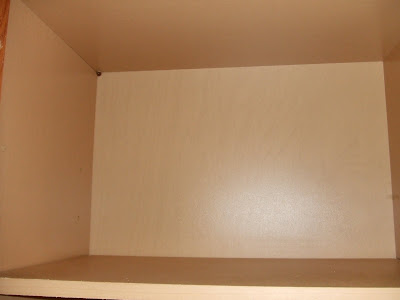
This next picture seems pointless but look carefully at the small black dot in the upper left corner. Yes that is a screw. The only screw. We realized that there was not more than one or two screws per cabinet! Yikes! Especially since I had loaded up our stock pile of canned goods from Sam's Club into these cabinets.
We pulled them all down and started with the stud finder. Ugh. Challenge number one. On an 8 foot wall we had 4 studs in very odd places. The first was the end of the wall on the far right. The next was about 18 inches in from that, then another 23 inches placing it just on the outside of the stove. The last one was only really a half of a stud on the inside wall. Suddenly we understood the one screw into basically the ceiling mount job they had done. We Googled yet again what the heck we were supposed to do about this. A mounting strip.
"Hi Ho, Hi Ho, back to Lowe's we go..."

We picked up some 1 x 2's to used as the mounting strip and some 4 inch screws to attach the cabinets. They had to be long because now they had to go through the cabinet, through the mounting strip, through the drywall and still have enough to grip the stud. We also got a 2 x 4 to use as a plumb line.
First we measured up from the cabinets and down from the ceiling (ended up dropping them about 3 inches) and did our best to level the crap out of that plumb line. Drill it in. It will also serve as a helping hand to hold those cabinets in place while you attach them. Next went in the mounting strips into the studs on the tops and bottoms of where the cabinets are supposed to have screws attaching them. You can see me above giving the faces a quick sanding before putting them back up. After you attach your first cabinet (making sure to keep level) then level out the second, attach to the wall then also to the cabinet next to it and so on. **Use the pre-drilled hinge holes to attach the cabinets to each other. ***Go in through the opposite side that you plan to mount the hinges on. We also discovered this is why many of our doors opened the wrong way.
The Stats
Days into project: 3
Project running total: about $32
Part 2 cost breakdown: boards $4, screws $6, clamps $22


No comments:
Post a Comment
We would love your comments! We want any and every bit of cheerleading and encouragement to keep us going on our goals. Plus knowing that someone is reading may help us get our projects done in a timely manner i.e. before 2011.